Part 2: Some mockups
Introduction
In my first article, I introduced my vision for a new document editor. Before I show some mockups to give a better idea on how this editor could look like, I would like to summarize this vision:
- Productivity: User can stay focused on what matters while writing his documents.
- Intuitiveness: Things are where they are expected to be. Little need to search where they could be in the menu or to search for help on google.
- Reliability: Adding, removing, editing content on the document should not unexpectedly mess-up the document typesetting.
- Powerfulness: All kinds of documents can be created, with a structure that can vary from simple to complex.
Mockups
Edition and view mode
First of all, as you can see in the below mockups, the user can switch between an edition and a view mode. The edition mode is meant to be an approximation of the final document. When the user clicks on the view mode tab, the editor requires the backend to generate the final document, so that it can be displayed to the user. This workflow has the following advantages:
- As the user is writing the document content, he will be less distracted by formatting details, because he can’t see all of them yet. It makes him easier to start and stay focused on the most important, the content edition, and delay to the end the less important, the formatting optimisation and corrections, so that he would spend less time on that.
- The editor mode can be optimised for a better edition experience, because there are no constraints to have the document looking like the final document.
- For the same reason as above, it significantly reduces the complexity of the development of the editor.
An empty document
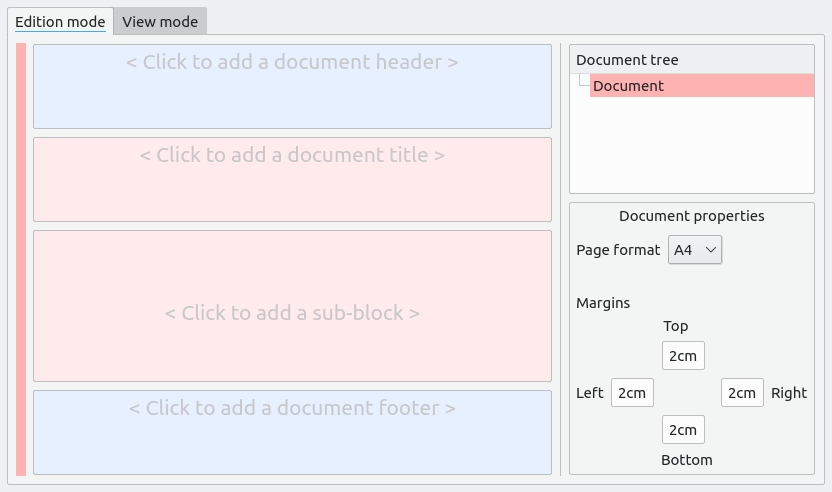
On the right pane, there is a document tree view that enables easy navigation in the document. Below, there is a properties section that only shows what is relevant based on what is selected in the document. This enables the interface to remain clean and intuitive instead of cluttered.
The user can optionally add a document header and footer, as well as a document title. Then he can add a sub-block, which is going to be the first paragraph of the document…
Adding a paragraph
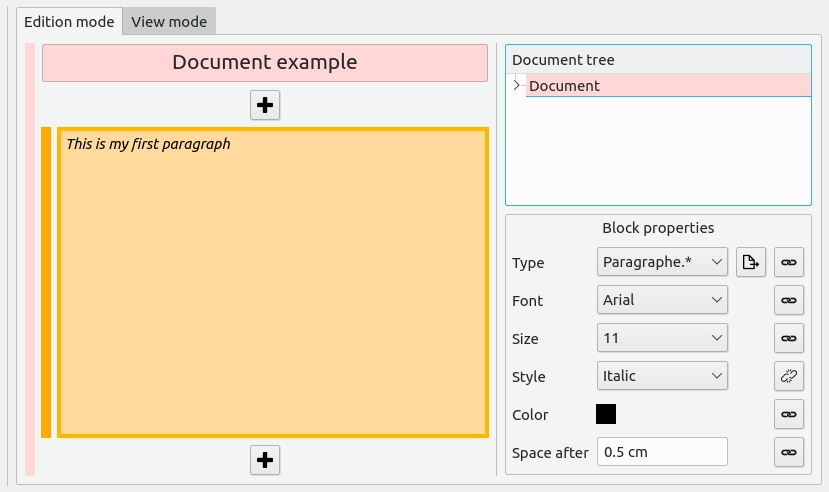
After adding a paragraph, the properties section is updated to only show what is relevant for the paragraph. Note the  icons on the right. It means that a change in a property will be applied to all texts that are also of type paragraph. In this example, the user wanted this paragraph alone to be italic, therefore he clicked on this icon to unlink this property from the paragraph default style. Other properties remain linked with the paragraph default style, so when a change happens on them, all paragraphs will be updated. With the
  icon, the user can provide a name for the sub-style to make it available elsewhere in the document.
Like with MS Word, pressing the Enter key will add a new paragraph. Alternatively clicking on one of the ![]() icon can do the same.
icon can do the same.
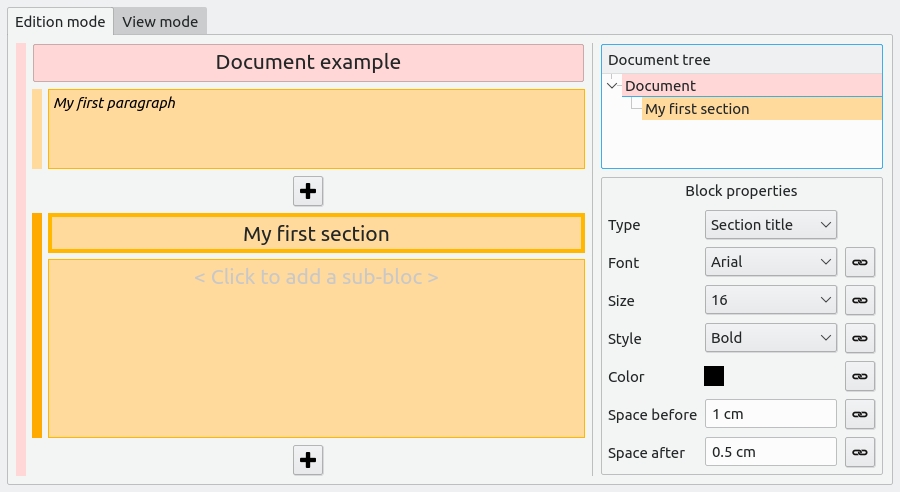
Adding a section
As the section title is selected, its properties are accessible in the properties section.
A more complete document
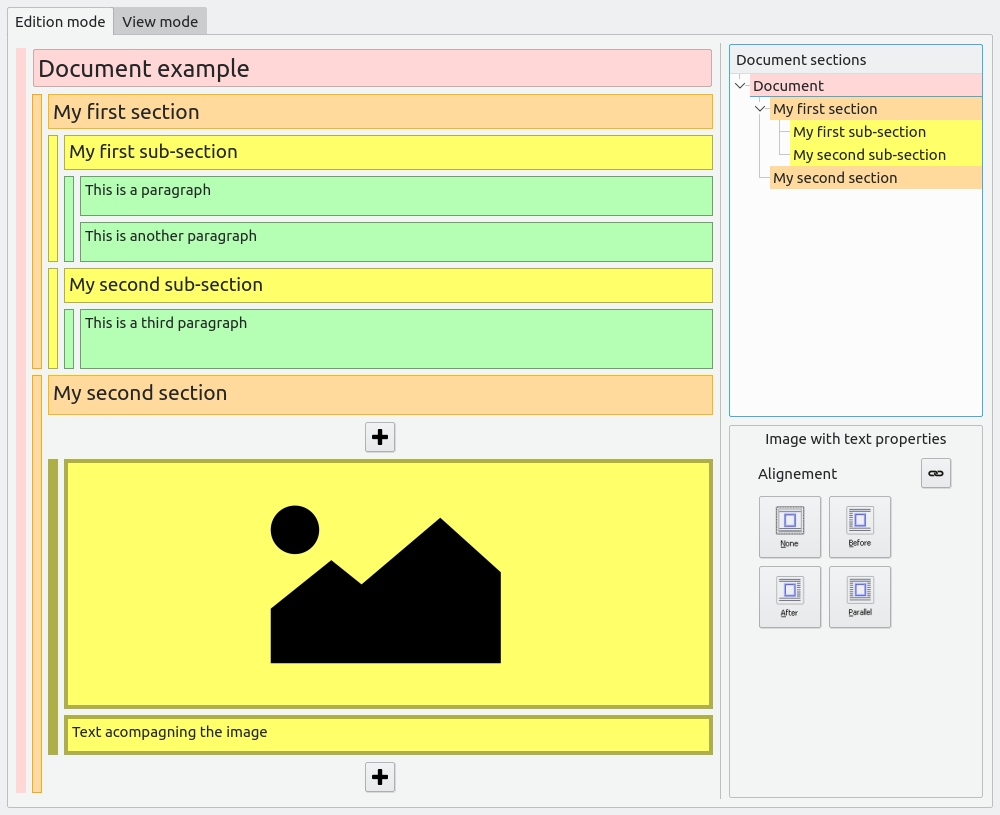
The colored bars on the left give the user a better look on the structure of the document he is writing.
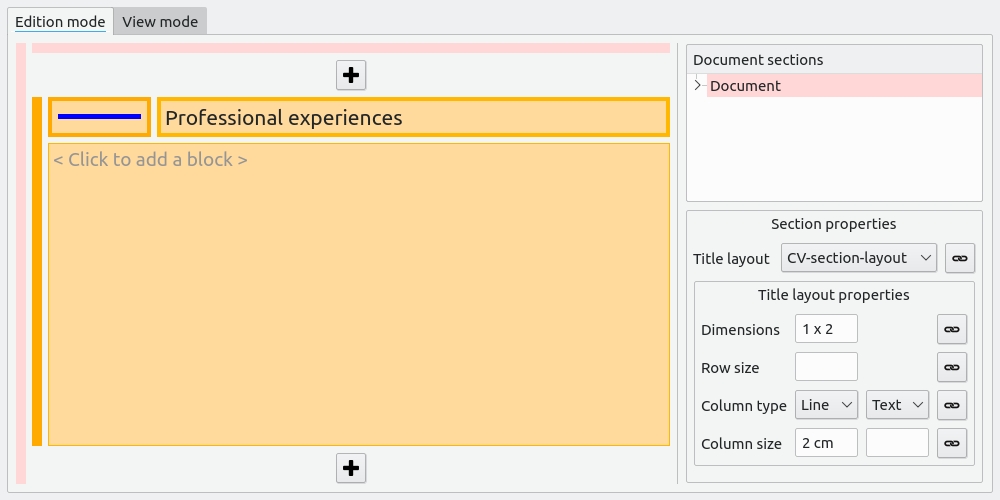
Adding a CV section
In order to be able to create a similar CV as the one shown in my previous article, the user needs to add a 2 columns layout with the needed specifications. This will be necessary for both CV sections and CV entries, but let’s start with the first CV section:
Adding a CV entry
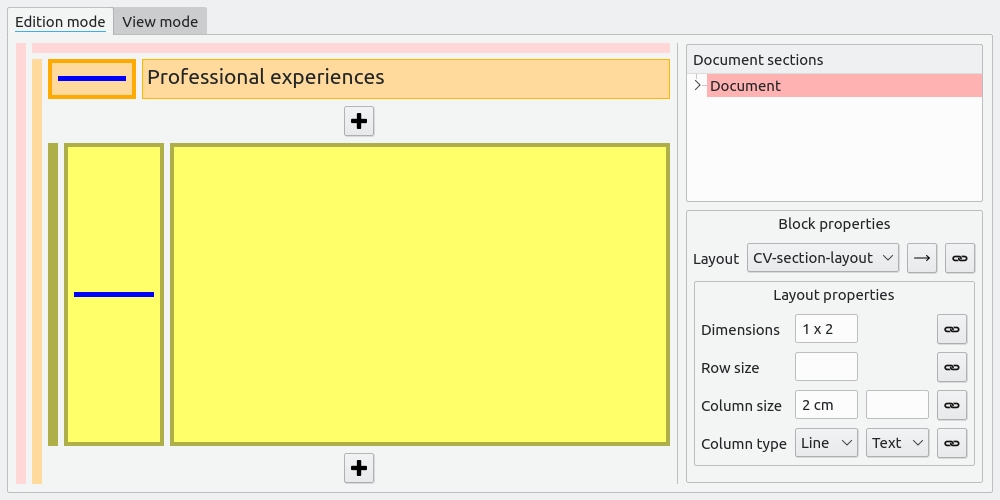
As the user added a CV entry in the professional experiences section, he also needs a 2 columns layout. This layout has the same dimensions & sizes as the CV section layout. Therefore, the user can select the same layout, so that when the sizes are changed both the CV section and the CV entry layout will be updated.
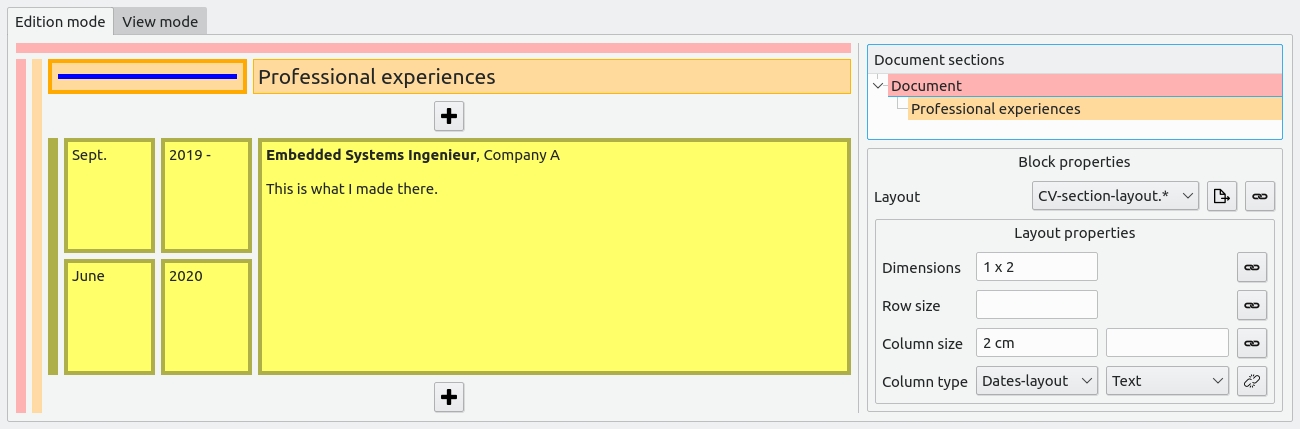
Correcting the CV entry layout
The type of the first column should however be a 4 x 4 layout instead of a line. The column type has first to be unlinked, then the correct layout can be applied.
Conclusion
I believe that such a user interface will make it easy to exploit the reliability and the power of a TeX based backend, so that the vision explained in the beginning can be fulfilled. Moreover, for advanced usage or for features that aren’t implemented yet, it will be possible to insert some backend code in a block, just as LyX allows the user to insert LaTeX code blocks (ERT) in a document.
What comes next?
In my next article, I will explain the technical choices that I am going to make, as well as what I would like to implement in the prototype so that it can be a valid proof of concept.